Showing posts with label Large Language Models. Show all posts

Friday, 17 October 2025

Model Context Protocol: Local MCP Vs Remote MCP


                            In the world of AI, the Model Context Protocol (MCP) is a game-changer. It's an open-source framework that lets large language models (LLMs) securely connect with external tools and data sources. Think of it as a universal remote for AI agents, allowing them to do more than just generate text—they can interact with the real world, like fetching data from a database, checking your calendar or sending an email. But when it comes to deploying an MCP server, you have two main options: Local MCP and Remote MCP. Which one should you choose?

This guide breaks down the core differences, including the pros and cons of each and provides step-by-step instructions on how to set up both.

NOTE: To get initial understanding on MCP server, refer the below blog post:
Understanding Model Context Protocol(MCP)


Local MCP vs. Remote MCP: The Core Differences

The fundamental difference lies in where the server is hosted and how it communicates with the AI client.

A Local MCP server runs on the same machine as the AI client (e.g., your desktop or laptop). It's great for development and personal use because it's fast, and all communication happens over a local connection, often using stdio (Standard Input/Output). You have full control over the data and tools it can access, as they are on your machine. However, it's limited to that single machine and isn't accessible over the internet.

A Remote MCP server is hosted in the cloud/common server, accessible over the internet/intranet via HTTP or HTTP+SSE. It’s designed for accessibility and scalability. Since it’s hosted, multiple users and clients can connect to it from anywhere. Think of it as the difference between a local desktop application and a web-based service. Remote MCP is the key to bringing powerful AI agents to a wider audience, including web apps and mobile devices and it often uses secure web standards like OAuth for authentication.

Local - Remote MCP

Creating a Local MCP Server

Setting up a local MCP server is the perfect way to get your hands dirty and test things out. We'll use a simple Python example, which is a common and straightforward approach.

Step 1: Setup your Environment

First, ensure you have Python installed and are using a virtual environment, which is standard practice in a professional IDE like PyCharm

Step 2: Install Dependencies

With your virtual environment activated, install the necessary packages.

pip install fastmcp

Step 3: Write the Server Logic

In your PyCharm project, create a file named server.py. In this file, you'll define the tools your MCP server will expose. Tools are just functions that your AI client can call.

A real-world example: an MCP tool that can fetch stock prices using a financial API.

from mcp.server.fastmcp import FastMCP
from typing import Any
import requests

# Initialize the MCP server
mcp = FastMCP("MyLocalStockBot")

# Define a tool to fetch the current stock price
@mcp.tool()
def get_stock_price(ticker: str) -> str:
    """Fetches the current price of a stock using a public API."""
    try:
        api_url = f"https://api.example.com/stocks/{ticker}/price"
        response = requests.get(api_url)
        response.raise_for_status() # Raise an exception 
        data = response.json()
        price = data.get("price")
        if price:
            return f"The current price for {ticker.upper()} is ${price}."
        else:
            return f"Price for {ticker.upper()} not found."
    except requests.exceptions.RequestException as e:
        return f"Error fetching stock price: {e}"

# Run the server
if __name__ == "__main__":
    mcp.run(transport='stdio')

Step 4: Run the Server

Now, you can run your server directly from PyCharm's terminal
python server.py
Your server will start and listen for requests from any MCP client configured to connect to it locally. Clients like Claude Desktop or certain IDEs can be configured to point to this script, allowing you to use your custom tools within your AI chat sessions.

Creating a Hosting a Remote MCP Server


This is where things get a bit more involved, as you're moving from a local machine to remote environment. The key is containerizing your application and using a platform that can host it as an remotely-accessible service.

Step 1: Prepare the Server for HTTP Transport

Modify your server.py to use an HTTP transport instead of stdio. This requires a web server framework. Let's stick with FastAPI, which integrates nicely with FastMCP.


from fastapi import FastAPI
from mcp.server.fastmcp import FastMCP
import uvicorn
import requests

app = FastAPI()

# Initialize the MCP server
mcp = FastMCP("MyRemoteStockBot")

# Define your tools here (same as the local example)
@mcp.tool()
def get_stock_price(ticker: str) -> str:
    """Fetches the current price of a stock using a public API."""
    try:
        api_url = f"https://api.example.com/stocks/{ticker}/price"
        response = requests.get(api_url)
        response.raise_for_status()
        data = response.json()
        price = data.get("price")
        if price:
            return f"The current price for {ticker.upper()} is ${price}."
        else:
            return f"Price for {ticker.upper()} not found."
    except requests.exceptions.RequestException as e:
        return f"Error fetching stock price: {e}"

# Add the MCP endpoint to your FastAPI app
app.include_router(mcp.get_router(), prefix='/mcp')

# A health check endpoint is always a good idea
@app.get('/health')
def health_check():
    return {"status": "ok"}

Step 2: Containerize your Application

To deploy on a remote server, it is good to package it into a Docker container. Create a Dockerfile in your project directory.

Dockerfile:

# Use a slim Python image
FROM python:3.12-slim

# Set the working directory
WORKDIR /app

# Install dependencies
COPY requirements.txt .
RUN pip install --no-cache-dir -r requirements.txt

# Copy the application code
COPY server.py .

# Expose the port the app will run on
EXPOSE 8080

# Define the command to run the application
CMD ["uvicorn", "server:app", "--host", "0.0.0.0", "--port", "8080"]


You'll also need a requirements.txt file listing your dependencies: fastapi, uvicorn, fastmcp and requests

Step 3: Deploy to a remote environment

If you are deploying in the corporate environment, you have the advantage of default layer of security. Here's how you can deploy your containerized application on a company server without using a public cloud provider.

  • Build the Docker Image: On the server, build your Docker image from the Dockerfile.
        docker build -t my-mcp-server .
  • Run the Container: Run the container on the server, mapping the internal port to a public port
        docker run -d --name mcp-server -p 8080:8080 my-mcp-server
  • Configure Access: The server is now running. For other users or services within the company to access it, they'll need to use the internal IP address or domain name of the server, along with the exposed port (e.g., http://internal-server-ip:8080/mcp). Access control can be handled through a company firewall or network policies.

Remote MCP servers are a powerful way to make your custom tools and data sources available to a wider range of AI applications. By containerizing and deploying to a server, you can build scalable, secure and always-on integrations for your AI workflows.


Friday, 24 January 2025

Large Language Models - LLM on Local Machine

                        Large Language Models (LLMs) have revolutionized AI by enabling machines to understand and generate human-like text. While major companies are offering these models over cloud, many users are exploring the benefits of running LLMs on locally on their machines, especially when privacy, cost-efficiency, and data control are key considerations. Running LLMs traditionally requires powerful GPUs, tools like Ollama make it possible to run models locally on your machine, even with just a CPU.

Let's explore how to use Ollama on a local machine via the command line (CLI), without writing any code, and discuss the advantages of running LLMs locally using only CPUs.


Why run LLMs locally on your CPU?

Running LLMs on a CPU offers several key benefits, especially when you do not have access to high-end GPUs:

1. Cost Efficiency

  • Cloud-based APIs can incur significant costs, particularly if you're running models regularly. By running the model locally, you eliminate the costs.

2. Privacy and Security

  • Keeping all data processing local ensures that sensitive information doesn’t have to leave your machine, protecting your privacy and offering full control over your data.

3. Flexibility and Control

  • Running an LLM locally on your machine gives you the freedom to customize it for specific use cases without being constrained by cloud service terms or API limitations. You can use it in your preferred workflow and modify it as needed.

4. Zero Latency

  • By using a local installation, you avoid delays that come from network calls to cloud services, giving you near-instant access to the model.

Ollama


Ollama is a simple, user-friendly tool that allows you to run pre-trained language models locally on your machine. Ollama is optimized for both CPU and GPU usage, meaning you can run it even if your machine doesn’t have powerful GPU hardware. It abstracts the complexity of setting up models and running them, offering a clean command-line interface (CLI) that makes it easy to get started.

Setting up Ollama:

Step 1:
  • Visit the Ollama website to download the installer for your platform (Windows, macOS, or Linux).
  • Follow the installation instructions provided for your operating system.
Once installed, you’ll have access to the ollama command directly in your terminal.

Step 2: 
  • Open the terminal and check the ollama installation with the below command
    • ollama --version

      This confirms that ollama is installed properly.
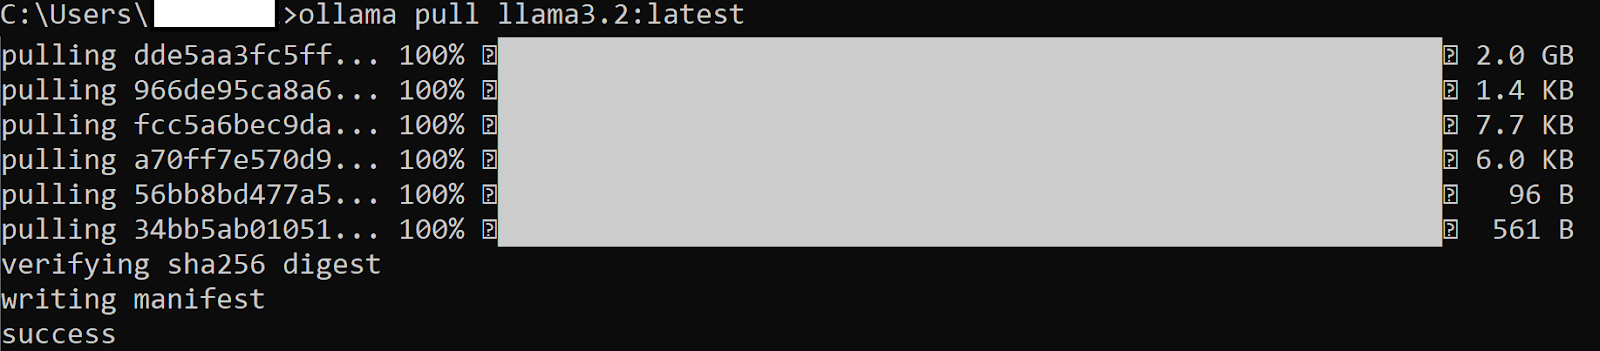
  • Pull any locally deployable model like llama 3.2 
    • ollama pull llama3.2:1b 


  • List the models downloaded in the local system
    • ollama list

  • Run the model and start the conversation with ollama
    • ollama run modelname


Useful Ollama Commands:


Comamnd Description
ollama serve Starts Ollama on your local system.
ollama show Displays details about a specific model, such as its configuration and release date
ollama run Downloads the specified model to your system.
ollama list Lists all the downloaded models
ollama ps Shows the currently running models
ollama stop Stops the specified running model
ollama pull Pulls the specified model to the local system
ollama rm Removes the specified model from your system
bye Exit the ollama conversation


Challenges and Limitations of running LLMs locally on CPUs

While running LLMs locally with Ollama has many advantages, there are some limitations to keep in mind:

  • Performance on CPUs: Running large models on CPUs can be slower than using GPUs. Although Ollama is optimized for CPUs, you may still experience slower response times, especially with more complex tasks.

  • Memory Usage: LLMs can consume a lot of memory, and running them locally may require a significant amount of RAM. Ensure that your machine has at least 16 GB of RAM for decent performance. Larger models will require more memory, which could lead to slowdowns or crashes on systems with limited resources.

  • Model Size: Some larger models, such as GPT-3, may not be practical to run on a CPU due to their massive size and resource requirements. Ollama offers smaller models that are more feasible to run on CPU-based machines, but for the largest models, you may still need a GPU for optimal performance.


Conclusion:

Ollama makes running LLMs locally on a CPU simple and accessible, offering an easy-to-use CLI for tasks like text generation and question answering, without needing code or complex setups. It lets you run models efficiently on various hardware, providing privacy, cost savings, and full data control.